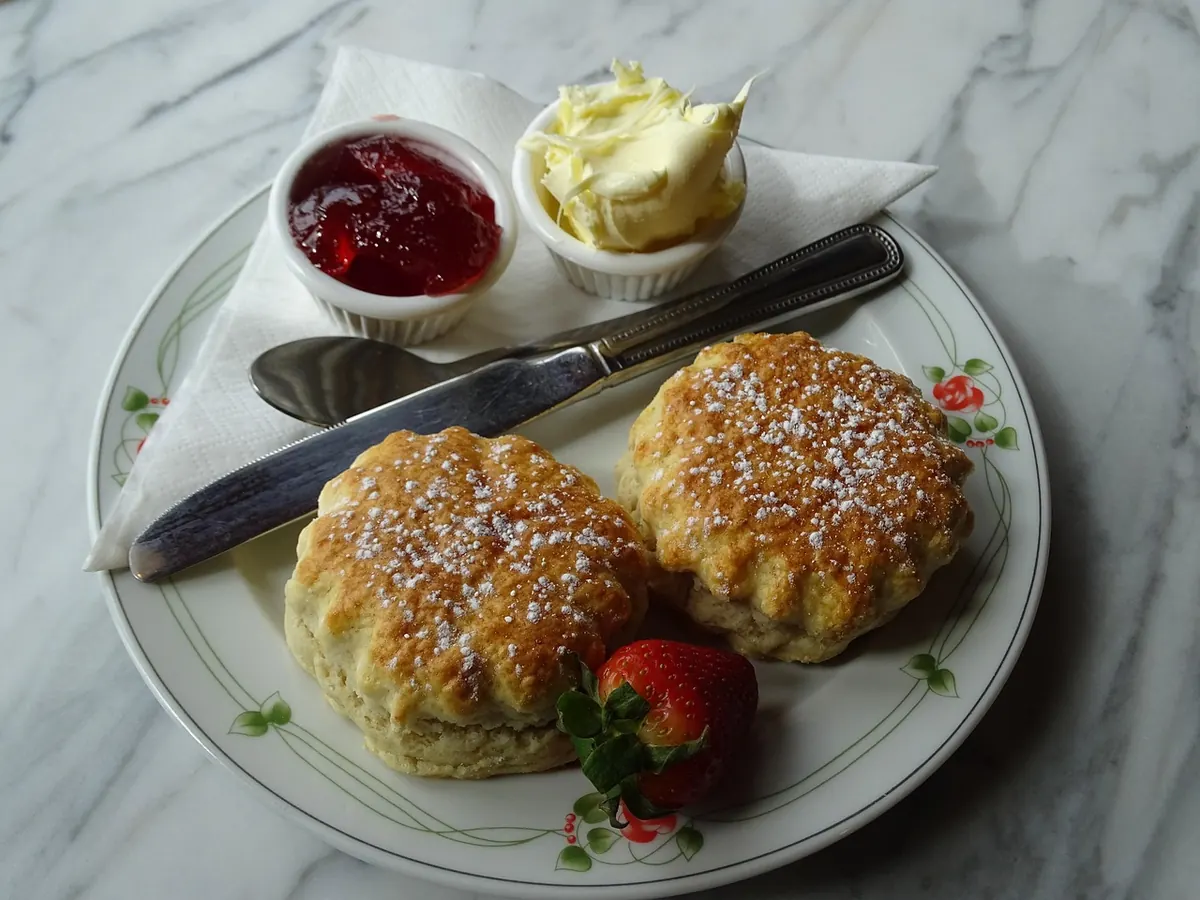
A scone punishes ambition. Work the dough hard and you get something closer to a hockey puck than a tea-time classic; handle it gently and barely at all, and you get a tall, craggy, buttery thing that splits along its own waist. That is genuinely good news for a beginner. Most of the skill in a first batch is restraint, a hot oven, and not overthinking it.
What follows is the formula British bakers keep coming back to: a short list of ingredients, a ratio you can scale up or down, and a step-by-step first bake that should get you from cupboard to cooling rack in about forty minutes.
A scone is a quick bread. It rises from baking powder or self-raising flour rather than yeast, which means no proving, no waiting, and no risk of a dough that never gets going. The texture you're after is soft and a little crumbly, with a faint seam around the middle where the top and bottom halves want to separate.
They are lightly sweet — a scone is not a cake. American biscuits are close relatives, but biscuits usually carry less sugar and often more butter, and they're served savoury. A British scone sits somewhere between a biscuit and a very plain sponge, and it's designed to be eaten with cream and jam, or butter, or nothing at all.
Substitutions mostly work, with small consequences. A vegan baking block behaves much like butter. Plant milks are thinner than dairy, so hold a little back and add it only if the dough feels dry.
If you remember one thing, remember this: for every 100g of flour, use about 25–30g of butter and 50–60ml of milk. Sugar stays under 20g per 100g of flour for a classic tea scone, and salt is a pinch per 350g.
That scales cleanly. A useful beginner batch looks like this:
That makes eight or nine scones with a 6cm cutter. If you're using plain flour instead, add two teaspoons of baking powder and sift it through with the flour.
One note on measuring: flour settles, and a cup of it varies quite a bit depending on how you scooped it. Weighing takes ten seconds and removes the main reason first batches come out either dry or sticky.
Almost always the oven wasn't hot enough, or the raising agent was tired. Old baking powder loses its punch — check the date, or drop a spoonful into hot water and watch for a vigorous fizz.
Overworking. Rubbing, kneading and twisting all develop gluten, and gluten is what makes bread chewy rather than cakey. Handle the dough for less time than feels right.
Too little liquid, or too long in the oven. The dough should feel slightly tacky, and the tray should come out as soon as the tops are golden. A couple of minutes past that is the difference between tender and dusty.
Scones are best within a few hours of baking. Split them by hand rather than with a knife — a knife compresses the crumb — and warm them for three or four minutes in a low oven if they've gone cold.
Then there's the argument. In Cornwall, jam goes on first and cream on top; in Devon, cream goes on first and jam on top. Both are correct somewhere. Clotted cream is traditional, thick and faintly yellow. Whipped double cream is a decent stand-in, and a little vanilla in it does no harm. If you'd rather have butter, have butter.
Write down what you did. The variables that matter most are the ones you control directly: how cold the butter was, how much milk went in, how thick you patted the dough, and how long they baked.
Once the plain version works, variations are easy. Swap 50ml of the milk for buttermilk. Add 60g of sultanas that you've soaked for ten minutes in hot water and drained well. Or drop the sugar entirely, stir in 75g of grated sharp cheddar and a pinch of mustard powder, and you have cheese scones — glaze with milk rather than egg and scatter a little cheese over the tops before baking.
The first batch is rarely perfect. It's usually a bit lopsided and gone by the afternoon. That's fine. Make them again on Sunday, change one thing, and keep notes. That's how a formula becomes your formula.
Photo: GX6 / Pixabay
Adapt any scone recipe to seasonal fruit and herbs by adjusting liquid, sugar, and technique — with pairing ideas, a...

A savory scone formula built on sharp cheddar, chives, and black pepper, plus a mix-in ratio for building your own...

Freeze shaped scone dough and bake it straight from the freezer for a taller, flakier rise. Here is how to wrap,...

Cozy scones and quiet moments..
